 T w e n t y S i d e d

I *finally* was able to start building the new computer. In fact, I’m writing this up very late in the day on Sunday on the new machine. I started putting components on the motherboard Friday. The interesting part is nothing went wrong. The new computer even started up first try. So far there is one thing just absolutely not working, and I have no idea why. But it’s the original mechanical SATA drive so I’m not all that bothered. Its primary function was replaced by the 1TB NVMe I recently found. The single most time consuming part of the build was wire management. I had to redo a few things, and the case instructions for one particular part are not accurate or helpful. I didn’t capture video, but I did take several pictures, so I will upload them as I write.
First step, the parts:
Left over from the previous computer, and hoping they still work: the AMD Ryzen 5600X CPU, 2×8 GB Patriot DDR4 3000 RAM sticks, a Seagate 2TB SATA mechanical hard drive, a PNY 500GB PCIe 4.0 NVMe M.2 drive, and a Sapphire AMD Radeon RX 6650XT video card. Oh, and one 120mm case fan, for reasons detailed later.
New: One Antec Constellation C8 Curve Wood dual-chamber computer case, an Asus TUF Gaming B550-Plus Wifi II motherboard, a Thermalright Peerless Assassin 120 Digital CPU cooler, a Samsung 990 Pro 1TB PCIe 4.0 NVMe M.2 drive, nine Asus TUF Gaming TF120 ARBG 120mm case fans, three Asus ARGB Gen 2 hubs, a Corsair 1000W modular power supply, and an LG Ultragear 32″ Curved QHD Monitor.

Please ignore how dusty the shelves are behind the computer parts.
Starting *last* Sunday I read through all the instruction manuals multiple times. This was really only important for the motherboard, the CPU cooler, and the ARGB case fans. The case instructions were well-made and *seemed* like they would be useful but ended up less significant than the others. Although I will point out that the motherboard, case fans, and cooler *all* required looking up additional information online. To be fair the motherboard info I was trying to find only came up on first boot, though. Also, despite finding problems with the instructions, this Antec C8 Wood case may be the best case I’ve ever had. I’ve built computers from the days of the beige box with sharp edges and metal burs to the early era of attempts to add decorative bezels and paint. My last case (the one before building an upgraded computer for Linux whenever that occurred) was a Silverstone Raven RV03. With the extensive fan mounting locations, rotated motherboard mounting, and lower-front power supply location I was sure I would continue using that computer case for the next few builds. But the dust filters broke one by one over the nearly-fifteen years I used it and the rotated motherboard mounting ended up being less-useful than I expected. Also when it came time to move the power supply back when I was trying to troubleshoot power problems in another computer, the mounting location was less than ideal. Not the worst I’ve ever seen; the RV03 seems to be an early example of the design that dominated before dual-chamber cases started proliferating. The computer I had been using hid the power supply in the back right lower area instead of the front. Installing and removing any power unit in that case was tremendously difficult and couldn’t, that I could ever find, be done without scratching something. In contrast the Antec C8 was easy to work with. Very few screws were involved in accessing the case; almost everything was press-fit ball-and socket joints. All power supply, motherboard, and drive screws were included in a tool box. They were in bags *in* the tool box, but the little plastic box actually had dividers and enough compartments to keep the different needed screws separate.

This is the back-side of the case, also what I see from where I sit at my desk because the computer is on a low table to my left. This side and the top just pull off. I’m sure the joints will wear out over time, especially if this is done often. I’m hoping that won’t happen.

Since this is the C8 Curve, the front and side come off as one piece (it’s very heavy, too). This piece has the only screw involved in accessing the interior of the case. The glass front/side piece is locked by a screw under the top panel. After removing that screw you slide the glass forward then lift up. The weight is the only complicating issue. Well, that and fingerprints on the glass. I would *like* to say all the work I will be doing is right in the big open area that looks like a traditional computer case interior. But when I get to wiring, I will have to CONSTANTLY rotate the case between the front and the back. If I would have set up to do this work in the dining room and used the big table, I could stand and move back forth instead of rotating the case. But I was pretty sure this was going to take at least a couple of days and didn’t want to block the use of that table. So instead it went on my work table here.
I did the first part of the motherboard outside of the case. Since I was using the same CPU but replacing the CPU fan I had to clean the surface of the CPU first. Easy to do with swabs and isopropyl alcohol right at my desk. The memory of course was no problem, but I was a bit concerned that the motherboard instructions said to install a *single* DIMM in slot B2; twin DIMMS (i.e. my 2 8GB DIMMs) in slots B2 and A2, and then install a *second* set of matched DIMMs (if necessary) in slots B1 and A1. My instinct would be to use A1/B1 first. I did eventually find references online indicating this is possibly a quirk of Asus AMD motherboards…regardless there were other references to the same and similar Asus boards using B2, then A2, then the 1 slots. And the computer booted and read the memory properly, so…
And I will note that while I *did* check that online, nothing I found contradicted what the manual said, which was apparently 100% correct in telling me to use B2 and A2 for my memory. So I won’t count that is “me needing to look up information online.”
More difficult were the NVMe’s. The Asus B550-Plus has two NVMe M.2 connectors. While I have used a few computers with NVMe M.2 drives, I’ve never installed one. I made a few rookie mistakes despite preparing. First, by default the motherboard comes with metal shields covering the install area. I didn’t get a picture of that. The shields are much longer than the NVMe drives. So, there’s a screw for one end of the shield, the M.2 jack, a screw stand to fasten down one type of NVMe, a rubber pad that supports the center of the NVMe drive, a screw stand to fasten down *another* type of NVMe, *another* screw stand to fasten down a *third* type of NVMe, then finally the screw for the other end of the shield. I didn’t realize at first there even *were* screw stands for different NVMe’s, and couldn’t figure out why my screws weren’t…doing anything. As if they weren’t even screwing in to something. Also you have to add another rubber pad on top of the existing pad if you are installing a single-sided NVMe. Which I did; I’ve never even SEEN a double-sided NVMe, but they must exist. This took an embarrassing amount of time to get right. On top of that one of the shield screw stands may be a bit wonky; I kept having trouble screwing the shield back on. I eventually rotated and flipped the shield which seems to likely solve the problem…so I’m leaving it alone as long as it works. Anyway, here’s the motherboard installed:

Next up was installing the Thermalright Peerless Assassin 120 CPU cooler. As far as I can tell Thermalright didn’t invent this cooler; I remember the first CPU cooler in my previous computer that dated back to the early 2010’s had a Noctua of the same design. This was the first time I started thinking about motherboard fan connections, ARGB connections, and cable management. After double-checking instructions I connected the two 120mm fans of the cooler to the motherboard near the back then passed the ARGB connection to the backside. The metal clips that attach the fans to the radiator are simple *once you understand how they work*. The instructions DID NOT HELP AT ALL. I had to look for a video example on YouTube, *specifically for the Peerless Assassin 120*. There are tutorials for other Thermalright coolers that are similar, but the Peerless Assassin 120 is different enough you need the specific instructions. Only after watching the tutorial a second time did I realize I had to rotate the brackets 90 degrees. But that could just be old age. Once you “get it,” you realize you can just pop those fans off anytime you want. For cleaning, obviously; but you would also need to remove the front fan to access the memory. Like if RAM ever gets cheap enough to upgrade this computer to 32GB (or more).

The final step directly on the motherboard is installing the video card, the Radeon I bought about a year ago. Nothing tricky here, although the case is advertised as supporting vertical GPU installation via a riser. However, it seems this riser is *not* included, nor did I get one with the motherboard. I wasn’t necessarily wanting to go with this option, but the website made me think it was an “out of the box” thing. I don’t doubt it’s useful, borderline necessary; with a larger, heavier card. Maybe those come with vertical installation options.

The Corsair power supply and Seagate mechanical hard drive installed to the backside; the second chamber. The power supply has a padded shelf and ventilation in every direction but the backside of the motherboard, which is appropriate. There is a cage for a 3.5″ drive and two SATA SSD’s. No wiring was done at this point. Even the power supply was 100% modular; there were no harnesses connected until late in the build. And that brought me to the case fans. I had originally selected Antec Fusion 120mm ARGB fans. The website for the case appears to use those fans which have an interesting RGB ring around the fan instead of lighting from the center-out over the blades as is usual. Two things stopped me. I read that the LED ring is only on one side, so depending on how you install the fans, the LEDs could actually not been seen. On this design, with the case interior meant to be viewed I don’t think it would be *that* big of a deal, honestly. BUT…I couldn’t find the Fusions. Only a few were for sale through independent sellers and they all had very limited stock. So I switched to the Asus TF120 ARGB fans. I could readily find three-packs of this fan, but never could get a single fan package. The three-pack was good; I needed three three-packs to fully install nine fans. But that still left the CPU exhaust fan at the back. Instead of selecting a different brand or model ARGB I decided to use a non-lighted 120mm from the previous computer. Some of the fans installed in that case were barely dirty and had very few hours. So that’s why the rear fan looks different.

As you can see, there are *a lot* of wires. The rear fan was simple; I tucked the wire in and connected the PWM lead to another connector next to the CPU cooler fans. But each three-pack adds six wires. The three PWM power leads all connect to a three-to-one adapter. While this simplifies the connection (one is less than three) the wires are still there. The three ARBG leads will connect to an Asus ARGB hub. Not pictured currently.

The side fans of course have the same wires, but the PWM leads will eventually connect to a chassis fan jack on the lower-front corner of the motherboard.

And that’s all the fans installed, but not wired up yet. The bottom fans’ power will connect to another chassis fan jack on the bottom edge of the motherboard. This next step is also the biggest jump in time. I finished the physical installation by around 1 PM Saturday. I finished the WIRING about midnight, eleven hours later. I took some breaks of course, but 2/3 of this computer was figuring out how to get it all connected. Or rather, mainly the ARBG and fans. That was most of the wiring by itself. Part of what took so long is the part the case manual didn’t fully or correctly describe. A few steps above when I mentioned installed the power supply and the Seagate hard drive, the manual says to remove an airflow partition that keeps the main chamber airflow separate from the back chamber airflow. The manual pictures and describes this as removing two locator screws, then pulling out the panel. There are actually three more screws. In addition to the screws described there are three that attach the other end of the partition. They aren’t, best I can tell, strictly necessary; but they aren’t “shipping only” screws, either; if you follow my meaning. But here’s the real kicker: once you’ve installed fans or a radiator, which is the next step to do according the the case manual installation guide; *those three screws are no longer accessible*. They *would* be accessible if you replaced the partition BEFORE you installed the fans. Which the manual doesn’t mention. The manual doesn’t actually say to reinstall the partition until the very end of the instructions…although even then it’s vague if that’s what they are referring to. Although I will also point out there are, in addition to the large rubber grommets you can see designed to allow wiring to pass through to the other side of the case, four openings from the front to the back. The top-panel wiring is actually already run through one of these.
You’re not supposed to use them. Because the installed airflow partition *blocks them*. The manual doesn’t mention this at all. So I had all of the fans installed and was ready to start cable management and connections when I discovered the problem. And had to walk away for a little while.
Anyway, here’s the finished effort:

From the front, that is. Looks super nice. Here’s the BACKSIDE:

Those three grey boxes with triangular buttons are the Asus ARGB hubs. The bottom one is connected to the ARGB Gen2 header on the motherboard. The three bottom fans are plugged to it, as well as a lead to the second hub in the middle. The three side fans are connected to that hub, plus a lead to the top hub. THAT hub connects to the three top fans AND has a lead to the ARBG CPU cooler fans. Each hub is also powered by a SATA power connection from the Corsair power supply, visible in the middle on the right of the picture. The SATA power connections also run the Seagate mechanical hard drive. A SATA data connection runs from the hard drive to the SATA connectors on the front edge of the motherboard. And while confirming some data writing this, I JUST NOW realized why that hard drive isn’t working. I plugged it into the nearest (relatively) SATA port. Connection six, technically. **If you have a second NVMe installed, SATA 5/6 IS DISABLED** Because they share bandwidth. So I only now realized the connection for the hard drive is disabled by my own actions. I’ll fix that sooner or later.
I haven’t tried adjusting the ARGB yet. Partially because the software is Windows-only and I haven’t installed the Linux open-source option that’s supposed to replicate the app; but mostly because everyone really liked the default spinning rainbow:

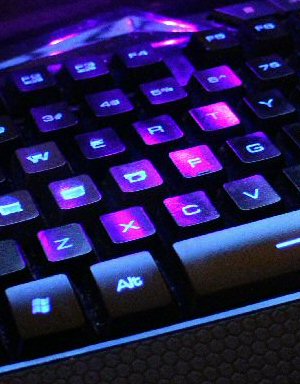
That picture is with the panels all installed. Everything POSTed on the first try; always an encouraging sign. In fact Manjaro booted from USB in just a few seconds and installed to the old system NVMe in only a few minutes. And since then I’ve got everything going necessary for the internet and productivity. Now…I still need to install WINE, Lutris, Steam, all the RGB/ARGB software and Input Remapper, which will require finding and installing all the drivers for Razer and my Redragon gaming mouse. This has programmable RGB’s, incidentally. I was able to get it working the other day on my laptop. Unfortunately my Razer Blackwidow Ultimate *2012* is…blue. Just blue. And it still works great, too. Haven’t made up my mind if I want to try finding a new keyboard with ARGB or just live with blue. The Razer Nostromo gaming pad is from the same era, and is also just blue. As for gaming, I do have an existing Steam archive on an external drive. I was using that with my laptop which has a teeny-tiny 256GB internal NVMe. In fact, I should have an EXTENSIVE if dated Steam archive on the Seagate SATA hard drive when I get it running. It’s that “dated” part that worries me. And considering I haven’t had access to it since the Summer I’m guessing there’s nothing on there that’s all that important.
The final step I did for hardware was replacing the monitor. I used to have a 32″ LED 1080P that went out a couple of years ago. It was still usable but dim, until I tried to replace the LED backlight strips. That were glued on. The whole thing was glued together; really. Hardly any screws. So that got thrown away. Here’s the new monitor:

I’m still getting used to the curve. It feels like the monitor is “looming” at me and the keystone looks wrong sometimes. I kept thinking there was a problem because it looked like the brightness was constantly changing. Turns out it was. This thing has an active power-saving mode that, on the highest setting, starts to dim the monitor only a second or two after it detects no changes. On the lowest setting this change happens after maybe five or ten seconds. So I turned it off. No more changes. I also configured brightness and contrast against a black and white gradient then, which resulted in dropping both of those numbers a bit. So…that’s done. Updates only as they are warranted. Here’s hoping computer issues can go bye-bye for a while.
See you next week!
Paige Francis He/him
What Does a Robot Want?

No, self-aware robots aren't going to turn on us, Skynet-style. Not unless we designed them to.
Linux vs. Windows
Finally, the age-old debate has been settled.
Project Button Masher
I teach myself music composition by imitating the style of various videogame soundtracks. How did it turn out? Listen for yourself.
The Witch Watch

My first REAL published book, about a guy who comes back from the dead due to a misunderstanding.
Quakecon 2012 Annotated

An interesting but technically dense talk about gaming technology. I translate it for the non-coders.
UPDATE: the next day I was able to install Lutris and the things needed to run it, Steam, the ARGB tools, and some software to control the CPU cooler’s top panel without any real problems. I’m getting a weird error that I haven’t nailed down in Polychromatic, but instead was able to get OpenRGB running. On the laptop it was the other way around.
FURTHER UPDATE: I was *wrong* about the dimming of the monitor being the active power saving. By the next day it was obvious the constant adjustments were still happening. The actual instigator was ACTIVESYNC, the thing that adjusts the sync rate depending on screen input. This is supposed to be mainly for gaming to match the sync rate to the action on the screen. I haven’t it studied it much, but I haven’t run across people saying they *notice* it happening. So, I don’t know if it’s just me, or if this monitor is bad at it.
Okay, I normally try not to be critical, but I really have to ask: why on earth did you buy a 1000w PSU for this build? One that’s not even 80+ rated, at that? Like, that’s a $150 part, and it’s massive overkill for your build. You could have spent $80 on a 750w 80+ Gold modular PSU, and it would have still been more than enough for your build, would be more reliable, and would still give you room to upgrade to something like an RX 9060 XT. The only ways this would make sense to me are that you either found it used for a screaming hot deal (in which case, congrats on your elite eBay skillz), or you’re planning on saving up to get an RTX 5080 or something and want the extra PSU headroom. And I still would have found something with an 80+ rating – cheaping out on PSUs with that much wattage is just asking for a literal meltdown. Please don’t ever actually plug a 5080 into that thing, for your own safety.
I want to stress that I’m not, like, mad or anything; it’s your money and you can spend it however you like. I just wanna know what’s up.
For me, at least, I buy oversized PSUs for noise control. If you operate a PSU at about half capacity, it will require much less cooling.
I bought this power supply because it was available on-the-spot when I had the money available to spend. I bought the 1000w over the (650w, 750w, or 850w; I can’t remember which) because it wasn’t 80+ certified and I knew I likely wouldn’t ever push it above around 50% usage.I figure it’s good for about 10 years of expected reliability. If I was using more power I would likely have to replace it much quicker, maybe six years. Although honestly that’s unknowable.
The metal shields you are mentioning that go over NVMe drives are usually heat sinks, and if so will have thermal pads on the underside with a little plastic sheet over them so they don’t gum up the NVMe stands while there’s no drive there. That plastic sheet needs to be removed so the thermal pads can contact the NVMe drives and conduct heat away from them. The drives will get very hot and thermal throttle the speed if they aren’t properly cooled.
Yeah, I forgot to mention that part in my writing. I did notice the thermal pads when I removed the shields and removed the plastic cover before replacing them. I also removed the plastic cover on the heat transfer base of the Peerless Assassin 120. I found it humorous that Salem Techsperts put up a video while I was building this machine showing that someone HAD NOT done that on a computer they were working on.
There’s also a GamersNexus review of a prebuilt PC where they didn’t remove the plastic on the thermal pads for the NVMe; there are a lot of poorly assembled prebuilts out there.
Wow that’s a beast of a CPU cooler. And a beast of a PC in general. I can’t believe my new PC (case) is now almost 10 years old. Back when I got into small form-factor PCs and watched endless Linus TechTips and PC Centric on YouTube about them, and eventually put my GTX 970, the newest part of my older PC, into the FTZ01 alongside a new motherboard, DDR4 RAM, i5 6600K. I didn’t realise how lucky I was to upgrade the motherboard in 2024 for my Windows 11 upgrade, before RAM prices became insanity. It doesn’t feel as if I ever really used the 16GB in the previous build, let alone the 32GB DDR5 I have now. I still have it in my head that an i5 3570k, a GTX970, and 8GB RAM is all anyone should ever need :D But then that’s probably quite accurate when the most recent ‘demanding’ game I’ve played on PC is Jedi Fallen Order. The GTX970 handled that at 1080p quite easily really.
I’ve been playing Jedi Survivor on PS4 and with the load times have been wondering if I should have updated it to use an SSD.
I had 32GB of RAM on my big computer before trying the Linux install on the previous (short-lived) incarnation of this computer. I miss the extra room, but at least on this install I haven’t bumped the upper limit yet. Prices for RAM had started increasing right when I needed to work on this computer. I ruled out DDR5 RAM and PCIe 5 motherboards because of the cost of anything I would connect to them, but that does limit my upgrades to the previous generation. *Sometime in the future* I’ve got room to move up on this base PC.
Many years ago I told everyone “the biggest upgrade you can do for the money is more RAM. You will be shocked how much better your computer will run with more memory.” Now it’s the SSD and/or NVMe upgrade. Moving to a SSD on a machine using a mechanical hard drive, especially a 2.5″, can make a world of difference.
Showing of the cooler a bit, it has a digital display on top that I got working in the past week. The default software is Windows-only, but there is a user-created Linux option. I have a pic in the next post.